
I usually construct a dress for a special occasion, only to
realize a few days before the event that I do not have the proper undergarments. A frantic search begins, and once again, the long-line bras of today
let me down - they just do not create the proper look for a 1950s silhouette.
Thanks to Gertie (her Blog for Better Sewing was one of the
first sewing blogs I happened upon), I had the idea of attaching a corselette
to the dress itself.

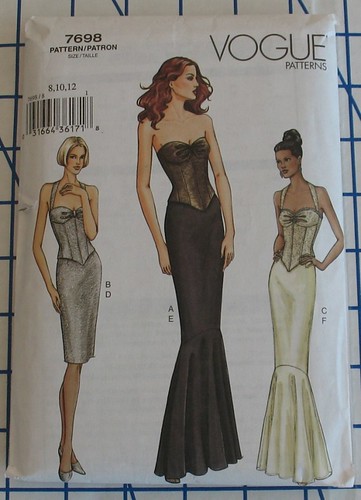
Instead of stressing about finding the proper pattern to use
for the corselette, I decided to restrict myself to my own pattern stash. The Victorian corset patterns were not
exactly the look I was going for – I did not want to flatten my bustline. I ended up choosing Vogue 7698, which was
designed as formal outerwear but had the basic silhouette I was looking for.
As with most patterns, I had to add a bit of length to the
torso. Thankfully, that was the only
real alteration that was necessary.

There is nothing worse than having something dig in at the waistline,
especially when seated. I love the fact
that this pattern extends beyond the waist, even though this dress obviously
does not need any shaping through the hips.
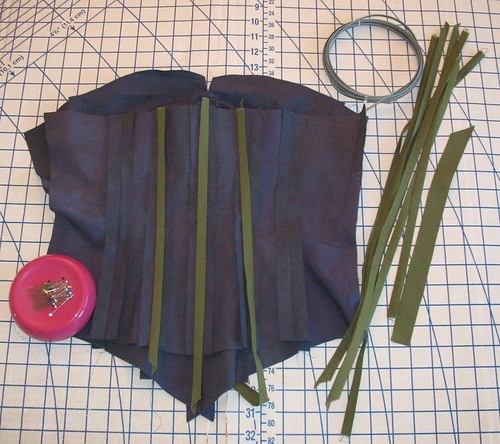
The cotton down proof ticking I am using as a coutil
substitute is from Vogue Fabrics (now a steely shade of blue thanks to a second
bath in RIT dye). I am very pleased with
how the fabric is working. It has an
incredibly tight weave that makes pinning a bit more challenging than normal,
but the corselette feels very sturdy without being bulky.
The few long line bras I already own all use plastic
boning. And after wearing them for a
couple of hours, the plastic warms up and bends to the curves of the body. So if I have been sitting and then stand up,
part of the boning sticks out at funny angles.
In an effort to avoid this, I decided to try spiral steel boning.
I purchased 12’ from lacis.com along with
boning tips so I could cut lengths as needed.
Unfortunately, my little jewelry wire cutters were not up the task of
cutting the stuff. However, I was able
to borrow a more heavy duty wire cutter from my boss that worked great. A tutorial over at Sew Curvy Corsetry was
very helpful for securing the boning tips to the ends of my cut pieces. I love how my jewelry pliers have now become
a useful sewing tool!
I used a bit of leftover yardage to create the boning
channels. I cut 1” wide strips on the
grain for all of the boning except the underwires, which were cut on the bias.
An old stretched out bra donated the
underwires (I knew there was a reason I was keeping it!). By the way, have you ever dissected one of
your bras? These things are evil
looking. Because of the multi-layered channels,
I assumed that the wires were thick and plastic, and maybe they are in some
cases. These, however, are thin, wire,
and scary looking.
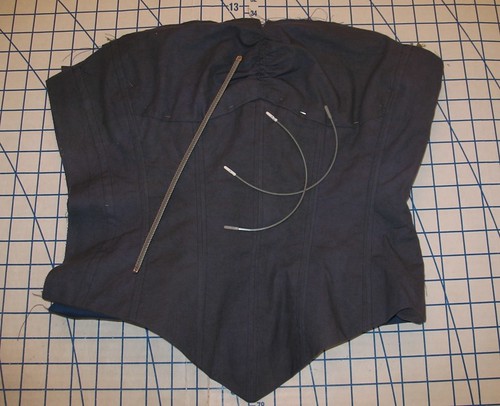
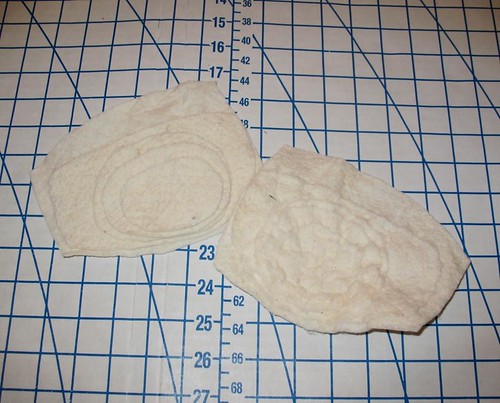
Using the tutorial from Tasia over at sewaholic.net I added bust pads to the corselette.
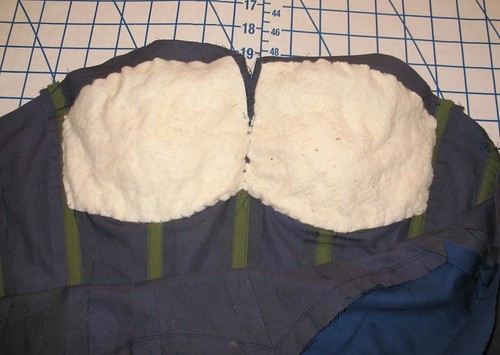
The same pattern pieces were used to create a duplicate
corset for the lining. I sewed the
bottom edge, right sides together with a
3/8” seam, and then turned it right side out with a finished lower
edge.

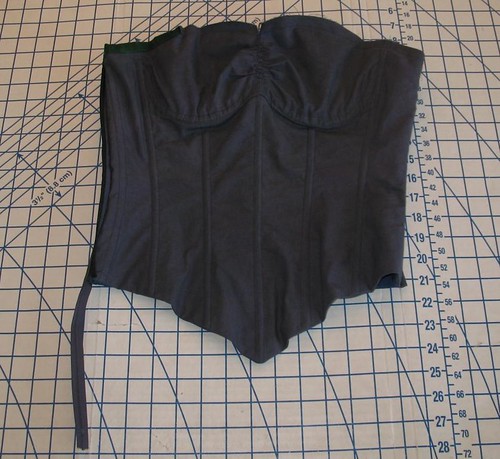
The side seams were basted
together, and the edges finished off with Hug Snug seam binding. If you are not familiar with this product,
you should be! The rayon seam binding
allows a beautifully finished seam edge without adding any bulk and I am
absolutely obsessed with it.
I purchased an 18” zipper.
This is obviously quite a few inches longer than the corselette,
however, it is necessary to have more length so it will open wide enough to go
over my head and shoulders. The zipper
will end up being a bit longer than the zipper opening on the dress. The zipper was hand picked with silk thread.
The raw upper edges will be basted to the front bodice and
treated as one piece.
With one week to go, time is running out . . . my bodice muslin fitting is up next!
Previous posts about this project may be found here:
This looks great. You make it look and sound so doable. Good idea following Gertie's advice, she's a go to of mine as well. Looking forward to your next post about this dress.
ReplyDeleteI am in awe this is quite exciting to see a dress during construction rather than all at the end. what a great idea.
ReplyDelete